Sunday, May 31, 2009

the Elissa Revisted


Before I move on from Galveston, I have some more images from our day sail on the Elissa. I made several attempts to capture close-ups of the hands of the crew but most were rejects except the top image. Part of the problem was the light, part was staying out of their way while they worked which made angle and composition of their hands difficult. I do think the image shows the strength and the ruggedness of this man's hand. For the second image, it was pretty impressive to watch the crew scramble up the rope ladders to tie up the sails at the end of the trip, but I can't say that feeling exactly comes across in this shot...you'll have to just take my word on that! Maybe a wider angle would have been better so the viewer could see the height these climbers rose to, but there was a lot of clutter below them and I chose not to include all that.


Camera info: Nikon D200 with 24- 70 2.8 lens, top image f8 at 1/250th, bottom imagef5.6 at 1/800th, ISO 100, cloudy whitebalance

Post processing: Top image: softlight background layer at 50% opacity, levels for brightness, Popsickle for details in the arm but masked off elsewhere. Bottom image: softlight layer at 50% opacity, curves for contrast, Luminizer for midtone brightness, the Edge for sharpening, Popsickle in softlight mode for details


Saturday, May 30, 2009

Another reason to go to Galveston


My son and his fiancee wanted their pictures taken in the flowers in the Galveston cemetery. I tried to tell them I still have a lot to learn about shooting portraits, but since my fee was right (free) they wanted to try. The top image was just a grab shot while they were being silly, acting like gophers I think! My son has blue eyes and he could not open his eyes all the way even when in the shade, poor thing; I guess light colored eyes are more sensitive to bright light. The next day they came over to visit and my son had gotten the haircut he needed BEFORE the photo session. Well, all I can say is it looked great.
Camera info: Nikon D200, 24-70 mm 2.8 lens. Top image f4 at 1/400th, bottom image f4.5 at 1/200th, ISO 100, fineweather whitebalance
Post processing: top image: reduced hot spots on faces with clone brush in darken mode, ran China Doll action from Kubota for skin smoothing and midtone brightening, the Edge for sharpening, the Icing for a little more contrast. Bottom image: cloned out distractions, duplicated that layer in softlight at 40% opacity, the Edge for sharpening, China Doll for skin smoothing.


Friday, May 29, 2009

Galveston shutters


Camera info: similar to yesterday's post
Post processing: Top image: cloned out distractions, darkened the white pipes, multiply layer at 23%, levels for brightness, softlight layer at 70%, Curves for contrast, painted with light and dark where needed, Colorbalance layer to reduce blue in the concrete, sharpened with the Edge. Middle image: removed part of a window on the right, softlight layer in 70% opacity, hue/sat layer to reduce the blue in the concrete, curves for contrast, levels for brightness, painted with dark or light on areas that needed it, ran Punch Drunk to intensify the colors, darkened the edges, sharpened with the Edge. Bottom image: Softlight layer at 75% multiply at 70%, levels for brightness, curves for contrast, merged and ran the highpass filter in softlight, Fudgesickle action for richness, PopSickle in softlight for more detail.


Thursday, May 28, 2009

Old Galveston


As a teenager I went to Galveston to tan on the beach or to buy old jeans at Col. Bubbie's (who died just recently) military surplus store but in middle age and since I have become interested in photography I love to go to Galveston for the photo opportunities --- from birds, architecture, landscapes, boats, people, street photography, events like Mardi Gras and Dickens on the Strand, you can always find something interesting to photograph there. We had a photo club assignment for Old Galveston in January and I decided to shoot many of the weathered window shutters and arched doors, as well as other architectural elements. Those alleys are rich with details like murals, old brickwork, rusty metal shutters, signs, meter boxes and pipes that make wonderful graphic designs. Some are in worse shape since Hurricane Ike devastated the island last September, but many look pretty much the same.
Camera info: Nikon D200, 18 -70 mm 3.5 - 5.6 lens, top image at f7.1 and 1/250th at ISO 650 fine weather whitebalance, bottom image: f11 at 1/90th ISO 400, fluorescent white balance (?how did that happen?)
Post processing: top image: duplicated the background in softlight at 70% opacity, levels for brightness, Popsickle for sharpening in softlight mode, duplicated Popsickle for more sharpening. Bottom image: cloned out a metal storage building and replicated the base of one column, duplicated that layer in softlight at 50%, levels for brightness, curves for contrast, Creamsickle action at 40% opacity, black and white adjustment layer at 20% for desaturation, merged layers in hardlight blending mode at 20% opacity, sharpened with the Edge.

Wednesday, May 27, 2009

Galveston Cemetery


I finally made it to the Galveston cemetery on Broadway when it was carpeted in yellow flowers. That was something I had heard about but never made it before the flowers were mowed, and it is definitely worth going to see. The flowers are so thick that many of the flat tombstones are completely obscured and the standing ones are often 1/2 way or more covered up. Most of the flowers are Coreopsis, but there are Indian Paintbrush and small white flowers I don't know the name for as well as spiky clusters that look like they may bloom but I think are all the plant produces. In the Galveston owned sections the flowers are allowed to grow until they seed and are then mowed but the Catholic Diocese sections are kept mowed.
Camera info: Nikon D200 with various lenses: Top image 60mm macro at f4 1/750th, middle image Lensbaby Composer with the f4 ring in at 1/400th, bottom image 60mm macro 7.1 at 1/60th, all ISO 100, fineweather whitebalance.
Post process: top image Punch Drunk, The Edge, and Ancient (50% opacity) actions by Kubota, levels for brightness. Middle image cleaned up distractions, the Edge, Punch Drunk, Popsickle (in softlight mode), Krypto Glasses at 50% opacity and finally merged everything and ran the high pass filter but changed the mode to softlight. Bottom image cleaned up pollen and spiderwebs, ran the Edge, Popsickle in softlight mode, Punch Drunk actions


Monday, May 25, 2009

More creepy faces


It was hard to find a way to capture this wall in just one image. I even went back several times at different times of the day but on clear days there are many shadows from basketball goals or the wall itself during the "golden hours", plus that area is not the safest part of Houston and you should not go alone. The top image gives you a better idea of the tiles that are obviously the children's artwork and for the other 2 images I tried to process the closeups a little "moodier" and for as much detail and texture as possible.
Camera info: Nikon D200, top image 18 -70 3.5 -5.6 lens at f8 and 1/800th -.33 exposure comp, ISO 200, shade whitebalance, close ups taken with 50mm lens at f2 and 1/20th ISO 200, 1/40th ISO 400
Post processing: top image: straightened the bottom brick ledge, duplicated the layer in linear burn blending mode at 40% opacity, duplicated that layer in multiply at 55%, levels for brightness, hue/sat to tone down the red tiles, sharpened with high pass filter. Close ups: duplicated the background in linear burn at 40% opacity, duplicated again in multiply blending mode at 55% opacity, curves for contrast in luminosity mode, sharpened with the Edge, ran "Ancient" action from Kubota at 25% opacity.

Sunday, May 24, 2009

Faces in the Wall


This wall is part of a church's outside recreation area in the 6th ward. I shot it for our club "Wall" assignment last year. The wall is actually very cheerful and vibrant and has handpainted tiles as well as plaster faces of children and adults and was made as part of a community art project. The faces can be disconcerting as the eyes are all closed and can appear as death masks but I imagine it was necessary to close their eyes when sticking their faces in the wet plaster. I chose to capitalize on that aspect and used a shallow depth of field with an unusual perspective so that the closer faces were in focus and it appears as if there are many faces receding away. Then I chose to remove the colors by using a black and white adjustment layer to add to the creepiness. If I remember, my entry (similar to but not the same as the top image) did not score well with our judges that night.
Camera info: Nikon D200, 50mm 1.8 lens, top image f2 at 1/20th but braced against the wall, bottom image f2 at 1/40th, ISO 100, shade white balance.
Post processing: Top image: duplicated background layer in Linear burn at 45% opacity, black and white adjustment layer, Curves for contrast, removed distractions in the foreground, sharpened with high pass filter. Bottom image: cloned away trash, duplicated the background in multiply at 25% opacity, duplicated that layer in softlight at 75% opacity, ran a Lomo action at 30% opacity, sharpened with the Edge.


Saturday, May 23, 2009

April and the hot dog/iheartfaces-week21


April belonged to dear friends of ours and I wanted to try to take her portrait not long after I got my first digital camera, a Nikon D70, and the SB 800 flash. My husband managed to set the flash up for me on a bracket, in TTL mode I think, and we put a black background up in our friends' house and she attempted to get April to pose by giving her hot dog treats. But April was an older dog and her hearing was not the best so we had some trouble getting her to face the camera. Finally Linda tossed a hot dog piece to her and somehow I actually captured that crazy top image. She was such a beautiful Dalmatian although she seemed to imitate a giraffe in quite a few shots too. Sadly April has passed on so I was very glad that I had the chance to capture some of her beauty and personality that day. These images were shot in jpg.
Camera info: Nikon D70, 18 - 70 mm f3.5 - 5.6 lens at f4.5 at 1/60th, ISO 200, flash
Post processing: cloned out one small piece of hot dog in the background, Luminizer to brighten, curves layer to darken the background, lightened her nose with Touch of Light, sharpened with the Edge.

Friday, May 22, 2009

Macro Mums


Camera info: Nikon D200, 60mm 2.8 macro lens, top image f4.8 at 1/5th, ISO 100; middle image f 3.5 at 1/25th; bottom image f2.8 at 1/90th.
Post processing: Top image: duplicated the background in a softlight layer at 20% opacity, sharpened with the Edge, darkened the edges by painting with softlight on a layer, highpass filter for final sharpening. Middle image: cleaned up spots, duplicated the background in softlight at 40% opacity, sharpened with the Edge, added both a Curves and a Levels layer for more contrast. Bottom image: cleaned up distractions in the background, levels and curves layers for brightening, curves for contrast, the Edge and PopSickle for details, and Punch Drunk for more punchy colors.


Wednesday, May 20, 2009

Squirt


These images are more shots from last July when the cardinals hatched outside my kitchen window. I don't think either one would win any awards but I think it is interesting to see the mother squirting liquid into the mouth of the baby in the first image. I don't know if the liquid came from the seed you can clearly see in the mother's beak or if the mother has to provide liquid for the baby to be able to swallow the food. I caught several shots with the female feeding the hatchlings and the one with the male cardinal passing something to the female to feed to them but my depth of field was too shallow to get them all in focus at once and I did not want to use a flash in this situation. With the low light my shutter speeds were often too slow to freeze the action. Also a branch often blocked part of the view. Still, those 2 days were fascinating to observe and photograph this little bird family.

Camera info: Nikon D200, 70 - 200mm 2.8 VR lens, first image at f3.4 and 1/180th, with a -.33 exposure compensation at ISO 400, shade white balance. Second image f6.3, 1/40th, -1 exposure comp, ISO 320
Post processing: set white and black points in ACR, used the white balance tool on a section of the baby's feathers to set the white balance better, duplicated the background layer on softlight blending mode at 28% opacity, ran Touch of Light/Dark action and lightened areas and darkened the edges, levels adjustment layer to brighten upper part, ran the Edge and PopSickle from Kubota for sharpening.


Tuesday, May 19, 2009

Sowle Sister

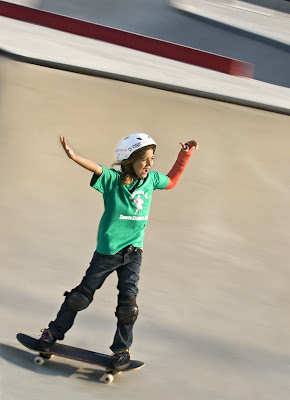
This girl had great expressions as she worked the walls with her board. For being so young she was pretty daring with her moves and I was impressed! I could have cropped in on this image but I wanted the viewer to see a little of the shape and depth of the bowl she was skating in. The clouds had covered the sun for a minute here as was happening on and off that morning.

Camera info: Nikon D200, 70 - 200 mm 2.8 VR lens, f4.5 at 1/640th, ISO 100, cloudy white balance
Post processing: cloned out a few dark spots in the concrete, ran PunchDrunk by Kubota but masked it from her face, ran The Edge and PopSickle (changed blending mode from hardlight to softlight) to sharpen and bring out details but again, masked off of her face, levels for global brightness, then Touch of Light action to lighten just her face a little.


Monday, May 18, 2009

Never Stop Sk8ting

This "Sowle Sister" was more than happy to pose for the phalanx of photographers at the event that morning. I shot a burst of images as she rolled past me and got different parts of each image in focus, but this shot is actually a combination of two because I had cut off the very front edge of the skateboard in this frame and used part of another image in the series to fill it in.

Camera info: Nikon D200, 70 - 200mm 2.8 VR lens, f16 at 1/25th, ISO 100, sunny whitebalance
Post processing: copied and pasted the right front wheel and edge of skateboard from another image, cloned on the background to blend it in, selected blank area above her head and moved it down so the lines of the edges of the pool were included in the frame, cloned where those areas overlapped to blend in, sharpened.

Sunday, May 17, 2009

Babes on Boards

Our photo club field trip in March was to the Lee and Joe Jamail Skatepark in Houston and it was the first time I had ever been to a skatepark, or tried to photograph skateboarders. The event was titled "Babes on Boards" and I was thinking it would be Roller-Derby-types of women, and while there were some of those, there were many little girls too. Some were led by a parent down a gentle slope, teaching little ones as young as about 3 years old how to balance. One pre-teen girl had her arm in a bright red cast and she did NOT sit on the sidelines and watch. I wanted to use a slow shutter speed with panning for motion blur images but found it hard to tell where the girls were going inside those empty swimming pools --- I just couldn't follow the action very well. Still I did get some action shots with stopped motion and I had a great time watching those crazy-brave girls.

Camera info: Nikon D200, 70 -200mm 2.8 VR lens, f5.0 at 1/640th, ISO 100, sunny whitebalance
Post processing: duplicated the background and cloned out distracting spots in the concrete,
ran The Edge, PopSickle and Krypto Glasses actions from Kubota and reduced the opacities to my taste and masked away areas that did not help the image, added a levels adjustment for brightness.

Saturday, May 16, 2009

More rodeo


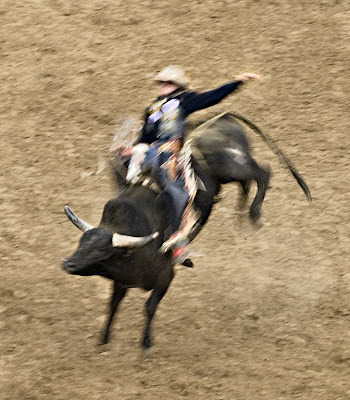
Three more shots from my night at the rodeo. It is really interesting to see what all you can get sharp, (or sharper) in an image --- sometimes an ear, the writing on the chaps, the bull's horn.

Camera info: same equipment as yesterday's post, shutter speeds and apertures ranged from the top image of f4 at 1/60th, middle image f5.6 at 1/30th and bottom image f5.6 at 1/25th.
Post processing: similar to yesterday's post.


Thursday, May 14, 2009

Rodeo motion blurs


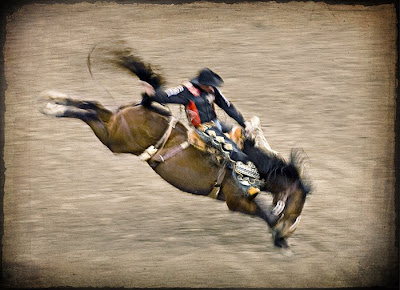
Our photo club assignment for May was "motion blur" and I went to the rodeo this year specifically to try shooting the events with a slow shutter speed while panning to see what I would get. I love just about any kind of blur in a photograph --- selective focus, Lensbaby distortion, shallow depth of field, motion blur, even just an image that is so out of focus you can only recognize iconic shapes like humans. (OK, that's kind of weird, what can I say?) I tried different combinations of aperture and shutter speed while panning and definitely got some motion blurs of the cowboys and their horses or bulls. I never got my white balance set correctly for whatever those lights are in Reliant Stadium so all of my images have a strange yellow cast that I have not been able to balance as well as I would like in Photoshop. My entry for the assignment was the horizontal image of the cowboy on the horse and got the high score for the night but only a Silver award, not a Gold.

Camera info: Nikon D200, 70 -200 mm 2.8 VR lens, f5.6 at 1/25th, ISO 400, cloudy whitebalance (OH, there is the problem!)
Post processing: Set white and black points in ACR and added fill or recovery if needed, in PS cloned out distracting elements in the dirt, colorbalanced to reduce the yellow cast in the dirt, levels for brightening, Luminizer from Kubota to open the shadows, Hue/Sat layer to reduce saturation in the background to make the cowboy pop, ran Popsickle for the details but masked it off of the background, added a texture and border, and finally darkened the edges.

Balinese Memories


Another rather strange Honor's Night at the photo club where my images got only good comments but not very good scores. It is hard to know what needs improvement with critiques like that. These piers are all that are left of the Balinese Room after Hurricane Ike destroyed so much of Galveston and this shot was taken about 3 weeks after the storm, a little after dawn. Again, I had a hard time deciding between the color or the black and white version, but something about the starkness of the monotone felt more in line with the bleakness of the scene to me so I went with that.

Camera info: Nikon D200, 18 - 70mm kit lens at 55mm, f18 and 1/125, ISO 200, fine weather white balance
Post processing: cloned white spots floating in the waves, dust spots in the sky, and a ship on the horizon, ran Luminizer from Kubota actions, levels adjustment for global brightening, duplicated the background layer and used multiply blending mode for the sky only, Black and white adjustment layer in High Contrast Red filter, sharpened with smart sharpen and PopSickle from Kubota.

Wednesday, May 13, 2009

Calla lily


Calla lilies are one of my favorite flowers. I loved the shape this flower made and although I tried different angles in composition, this view from above was my favorite. I followed Mark Westerman's tutorial and combined 4 images that focused on different segments so that I could get all of the surface of the flower in focus. However, I just layered the individual images in Photoshop, I did not use Combine ZM. I still intend to try that program one of these days. So, did I waste my time? Mike was not impressed with this image at all so I thought I would ask for other opinions. Also, I was not sure which version is better, the color or the sepia.
Camera info: Nikon D200, 60mm 2.8 macro lens, f4 at 1/125, ISO100, cloudy white balance
Post processing: Layered 4 images in Photoshop and masked out the blurry sections, merged visible and removed some spots and cloned one edge to line up, levels adjustment to brighten the flower, levels adjustment to brighten the background, Popsickle action from Kubota, Black and white warm and deep Kubota action for the sepia version

Monday, May 11, 2009

The Elissa Bell


It was a great day to be sailing when the four of us had the pleasure to be guests aboard the Elissa as she tacked around Galveston Bay in March. I was trying to get an interesting composition of this bell with as little specular highlights as possible when I saw one of the crew working on the deck behind it and decided to include him in the shot but not in sharp focus so the bell would stand out. For some interesting history on the ship and to see more great pictures check out the blogs from Shirley, Larry Patrick and Steve in their March posts from the list on the right of blogs I visit.
Camera info: Nikon D200, 24 - 70 mm f2.8 lens at 24mm and f2.8 at 1/8000th, ISO 100, cloudy whitebalance
Post processing: 3 separate levels adjustments to brighten the overall image and to bring up detail inside of the bell, sharpened with the Edge from Kubota actions


Sunday, May 10, 2009

Listen to your mama, child

In honor of mothers everywhere on this Mother's Day! I know exactly what that mama duck is telling her little one --- "Wash behind your ears, don't talk with your mouth full, be nice to your brothers and sisters, if you can't say something nice don't say anything at all, make sure you don't leave the house without clean underwear, etc etc" This mother duck must have blown into our subdivision pond with Hurricane Ike because I discovered these ducklings about 3 weeks afterwards. There were 7 when I first saw them, but sadly one by one the law of nature (and humans --- unnaturally) prevailed and only 1 survived, which is typical. I loved to see them everyday when I walked.

Camera info: Nikon D200, 70 - 200mm 2.8 VR lens with 1.7 teleconverter at f6.3, 1/160th, cloudy white balance, ISO 100, at 8:30 am
Post processing: set white and black points in ACR, ran a "boost" action by Pioneer Woman, sharpened

Saturday, May 9, 2009

Hot day at the park


Can you believe that tongue? Poor Pearl, it is only the first part of May and the heat is very hard on her. But after a few minutes of rest, I shot the second image and she was recovering well. She survived last year's heat just fine but she does love to be inside with us and the air conditioning.

Camera info: Nikon D200, 50mm lens at 1.8, 1/250th, ISO 100, cloudy white balance
Post processing: Curves layer for contrast, lightened her eyes and nose, selected the brick wall and ran a color balance layer to reduce the red, sharpened with the Edge from Kubota actions.

Friday, May 8, 2009

Salt marsh tree

I have tried to photograph this tree and the salt marsh several times --- in pre-dawn fog, on a cloudy sunset evening, and another clearer sunset using both a wide angle lens and my Lensbaby --- and have not really gotten an image I am satisfied with. This shot was taken on January 2, just as the sun broke through a cloud layer so I was able to get the reflection in the water. It is an interesting area and I plan on trying again.

Camera info: Nikon D200, 24 - 70 mm 2.8 lens at 48 mm, f6.3, 1/250th, ISO 100, cloudy white balance

Post processing: In ACR I added fill light to bring up the tree and the foreground, in PS I ran Kubota Luminizer, a levels adjustment for more brightness, a Hue/Sat adjustment for more blue in the sky, then painted with light and dark layers to bring out the detail in the granite boulders, and finally ran Kubota Edge for sharpening.

Thursday, May 7, 2009

At the Rookery

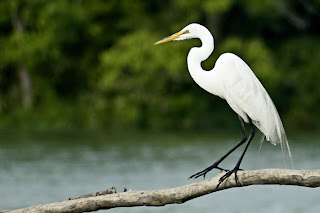
Last April was the first time I had ever been to the Rookery on High Island where this egret was photographed. It was quite an amazing sight to see hundreds of several kinds of shore birds nesting just inches from each other. The babies were in various levels of development from eggs to juveniles and several large alligators (crocodiles?) waited below in the water for any chance of a snack (which thankfully happened just before we arrived but not while we were there). This experience made me want one of those huge telephoto lenses but I was able to get some nice images with my inexpensive zoom. Sadly Hurricane Ike destroyed much of the area last September although many birds have returned to nest where they can. I have not had a chance to return this Spring but still hope to do so.
Camera info: Nikon D200, 70 - 300mm f4.0- 5.6 at 300mm, f 5.6, 1/250, ISO 100, cloudy white balance
Post processing: cropped the image, removed some distracting spots on the branch, ran Kubota PopSickle action to bring out the details, added a curves layer for black and white points and a levels adjustment to make it slightly lighter.

Wednesday, May 6, 2009

Grant

Grant was a fun, energetic and happy 2 year old who was staying with his Grandma and Grandpa for a couple of weeks. They were very nice to allow me to practice photographing him. I was glad the day was overcast so that I did not have harsh shadows to deal with. This was one of his rare moments of resting --- the majority of the morning I spent following him up and down and around the play equipment. He has very fine hair which the slight breeze would cause to stand up all around his head! I wonder what my photography friends think of the lighting on his face --- too much shadowing? Enough to see his face structure? What could I have realistically done here to improve this shot? Maybe I should have shot at a slightly smaller aperture, but the light was changing with the clouds and I wanted to blur the background as much as possible.

Camera settings: 50 mm lens at f1.8, 1/750, cloudy white balance
Post processing: a softlight layer at 50% opacity, lightened eyes by dodging with a brush in softlight blending mode, brushed in a lighter levels adjustment on the face only, cloned some mosquito bites from the skin, sharpened with both a high pass filter layer and an additional smart sharpen.

Tuesday, May 5, 2009

Fields of Gold

I thought I would start my blog by posting a Spring image, to go with the current season. This photograph was shot on a trip to Germany in 2007, with my Nikon D70 and the 24- 70 mm kit lens that came with the camera. At the time I had just started shooting with a digital camera and shot in jpg because I did not know how to edit images in Photoshop. We had been speeding down the Autobahn for several days and I finally begged our friend to pull over so I could photograph the incredible fields of yellow flowers. He just happened to stop near these 4 trees, near the village of Bamberg. The rapeseed flowers are used for cooking oil and as a biofuel in Germany and the fields are everywhere. I shot this handheld at 200 ISO, f22 at 1/100, in auto white balance. Very little post processing was done on this image: I removed some dust spots in the sky and did 2 levels adjustment layers to get more detail in the trees and the sky.